This weekend I moved my home studio from one room to another. From a nearly 200 square foot living room to a 100 square foot bedroom. It’s been a long time since I’ve thought about room acoustics and because this is a common situation for home studios, I thought I’d share my experience.
This article will help you understand and overcome the challenges of a dedicated studio in a small room. It will be most helpful to those with symmetrical rooms (no weird angles) and to those that don’t need all the usual bedroom stuff, at the very least it will be a starting point to making the best of the situation.
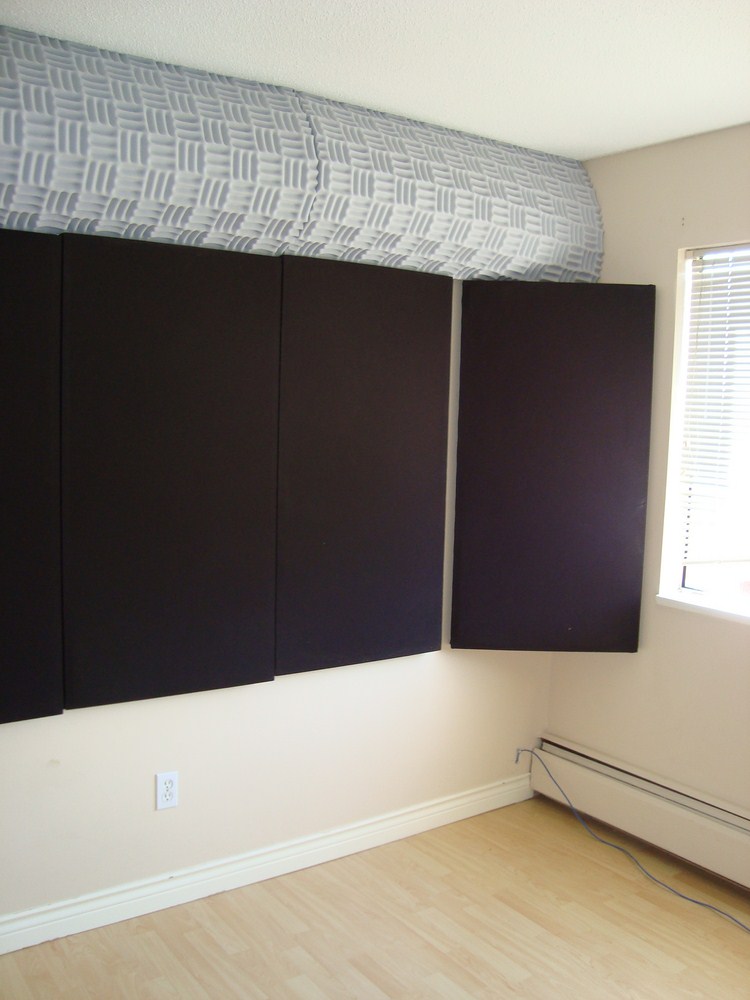 |
| Corner bass trap and broadband absorbers plus foam above. |
The Problems
Small rooms are more likely to have acoustic problems than larger ones, primarily flutter echo, room modes and early reflections that are too short. In my room, I knew there was a very bad flutter echo problem and room modes may be a problem but were predictable. The room is symmetrical which was an advantage the old room didn’t have. The measurements are approximately 11ft long x 9ft wide x 8ft tall. There is a door and a closet on the back wall and 6 x 4 window on the front wall.
Flutter echo happens whenever there are parallel reflective surfaces. The sound repeatedly bounces off each wall and creates a series of bright echoes. In this room it was almost like a spring reverb. I was getting it off the side walls, floor and ceiling and from the window and back wall. When this was used as a bedroom the flutter echo was unbearable, I actually had treatment in here just to be able to sleep, but that might just be me being weird. Luckily this is easy to fix.
Room modes, also known as standing waves, are again when sound bounces between parallel surfaces. When the wavelength is a multiple of the room dimension, you will have a standing wave. It’s an acoustic phase problem. This frequency will be amplified twice as loud close to the walls and cancel out completely in the center.
For example, The wavelength of 60Hz is 18.83ft. If the width of a room is exactly 18.83, the exact center of the room will have complete cancellation of 60 Hz. If we multiply the frequency by 2, then there are two dead spots at 120 Hz, and 4 dead spots at 240. The dead spots are called Nodes.
There are 3 types of room modes, each with more complex calculations, but the worst kind, and easiest to calculate is the Axial mode. Axial modes are calculated: Half speed of sound (1130/2) divided by room dimension (length, width or height in ft)
Calculate all three dimensions and multiply each result by 2x, 3x, 4x until above 300Hz. Room modes are only a problem in the low frequencies below 300 Hz.
Small rooms tend to have the worst standing wave problems, and not enough room to treat them effectively. Axial modes happen across the entire surface of the wall, and bass tends to accumulate in corners.
Early reflections, are the first bounce off a wall to your ear. So when the sound comes out of your speaker, goes past you, reflects off the wall and back to your ear. There is a certain acceptable time range for early reflections in a mixing position called the Haas zone, 5-30ms. Longer early reflections are ok because our ears and brain can separate them from the original sound, but if they are too short, like in an untreated small room the sound is blurred by the echo. Btw, leather chairs with headrests can also be a problem.
Symmetry
You might think that because there are all these problems with parallel surfaces bouncing sound around that we should avoid rooms with them. Perfectly square rooms are the worst. Two dimensions the same is bad and anything else can be treated. The benefit of parallel surfaces is that we can easily predict what the problems will be and more easily set up a balanced room. A room with one wall that angles out will prevent flutter echo in one dimension, but will make perfect stereo imaging from the speakers much more difficult. You can still get standing wave issues with non-parallel walls, it’s just way harder to predict and measure.
Acoustics resources
The Solutions
Window
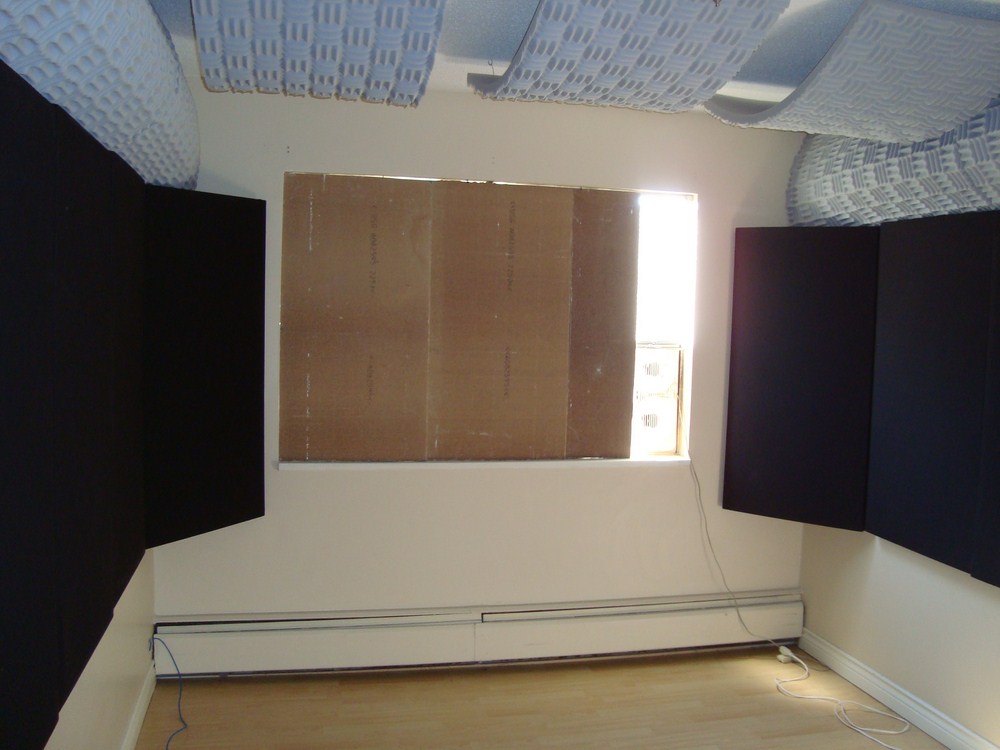
In the middle of the front wall of this new room I had a roughly 6 ‘x 4’ single-paned window. Two problems with this: reflects sound within the room, leaks sound in and out.
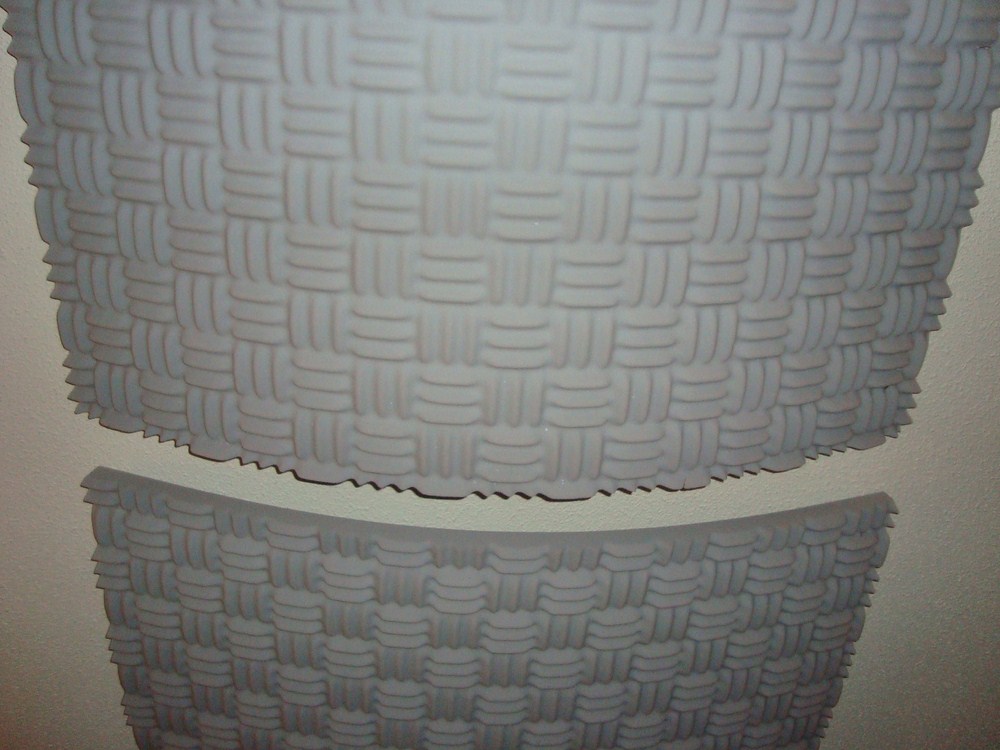
A while ago I scored some free acoustic ceiling tiles from a store that was being gutted. When cut to size these are very effective at reducing sound transmission through the window. They are non-reflective so sound doesn’t bounce off and they also work well for blocking sun and therefore heat. The downside of these is that they’re fragile and crumble easily.
I cut 6 of them to size and stuck them in the window 2 layers thick. I left room on one side to open the window for a fan. This is then covered with a curtain.
If you don’t want to go through all that, you should still cover all windows with thick curtains, which will not help much with isolation but will stop the reflection from the glass.
The RFZ
What tends to be a good, affordable plan of attack for most rooms, large or small is to create a “Reflection Free Zone” (RFZ) with a “Live End, Dead End” treatment concept, meaning the majority of acoustic treatment is positioned to the sides, ceiling and front wall of the room.
By installing the sound absorbing panels in this way, the flutter echo and early reflection problems are eliminated and the standing wave issues are greatly reduced, at least when in the mixing position. You only need to absorb on one wall to stop flutter echo. You can stagger the treatment on opposite walls if you’re short on materials.
I have 64 sq ft of 2″ rigid fiberglass panels on the sidewalls and front corners and another 56 sq ft of 1.5″ foam on the ceiling. Likely this is more than most people will have available and it is probably slightly more than I need, but it makes such a huge improvement.
Rigid Fiberglass
Rigid fiberglass is the best bang-for-buck acoustic absorption material. It absorbs well down to the lower mids. A few years ago I built several 2ft by 4ft broadband panels with fabric covered wood frames that are mounted to walls easily by just hanging off a drywall screw.
In my new room I have two panels across the front wall corners, then 3 panels across each side wall covering the first 8ft of the room. These are across the middle of the wall providing coverage for both sitting and standing listening. Mounting the corner traps is easy with a few hooks and a bungee cord.
You can increase the effectiveness of fiberglass absorbers by creating an air gap between the panels and wall of an inch or two. I have not tried this yet.
Foam
Foam is less effective than rigid fiberglass and is often not any cheaper and can be harder to work with. If you don’t have tools to build fiberglass broadband absorbers, then foam will still make a big improvement. I found a box on craigslist for a good deal a year ago so I use it in the less critical spots in the room, where I need to kill early reflections or flutter only. I have three panels hanging above the desk and mix position, this is called a cloud and it helps focus the sound from the speakers. I have 2 more foam panels above the fiberglass sidewall panels squeezed into the corner between wall and ceiling. I’m not sure of the effectiveness of these in this position but it looks pretty cool at least.
Monitor positioning
Monitor positioning can be tricky in a small room, especially if it is not symmetrical. When setting up a studio, have the short walls at your sides and speakers firing lengthwise. Don’t put the speakers directly in corners, as that will exaggerate the low frequencies coming from them. Instead set them up with enough distance to walk beside and behind them if you can. Use the same measurements for each side. My speaker stands are exactly 27 inches from the closest sidewall, 21 inches from the front wall and 60 inches apart (measuring from the pole). I started mine a little narrower than that but it didn’t sound as good. 50 to 70″ is where yours should be, not narrower than 4ft.
Speakers should be “toed in” at a 30* angle towards you.
If you think of your pair of monitors and head as points of an equilateral triangle, then where your head is should be within 18″ of that 3rd point.
The tweeters should be at ear level. Your speakers can be vertical or horizontal (I prefer horizontal) with the tweeters on the outside.
The Results
Having a dedicated space is great. At first I was worried that the small room wouldn’t sound as good but it turned out to actually sound better. I have better noise isolation, clearer sound from my monitors and still enough room to record acoustic and electric guitars and vocals here. Without all the acoustic treatment, this room would be a disaster.
With a more limited budget I could get by with 2 corner traps, 4 side panels and two foam cloud panels. The more absorption the better.
 |
| I really need that curtain…and a pro photographer! |

There is a wealth of information about studio acoustics freely available on Ethan Winer’s site: http://www.realtraps.com
This is true, but the problem with SO much information is it’s easy to get overwhelmed by it and not take any action.
Interesting project!
The main thing that stopped me building something similar at home, is that I never figured out a decent way to treat the corner that the door to the room is in. Difficult to put in a trap there.
What did you do? (Assuming your door is in the corner like most rooms)
I have not treated that end of the room, not seriously anyway, just scraps for now.
Like your room, I have a door in a corner, I have a closet across the rest of the back wall.
Treating all the corners is ideal but rarely practical. The horizontal corners where the walls meet the ceiling are wasted space but still a good place for bass trapping.
Focus on the mixing position and creating an RFZ there.
Hi Jon – interesting post; how are you getting on with the room a few months on now that you’re acclimatised to it? I’m curious as to why you prefer the monitors on their sides when most are designed specifically for vertical alignment. I can’t tell from the pic what monitors you have other than that you have that classic white cone vibe going, but many have moulded waveguides that are designed to spread the image sideways, and if active the cooling fins usually align vertically to channel heat more efficiently?
A
Good questions
Not sure if I mentioned this in the article but in the mix position it’s very dead. At the back there are still a few springy flutter echo issues and only low to the ground. My mixes are turning out fairly well in the room. I rolled up the carpet last weekend and got some decent acoustic guitars done at the back of the room. Adding diffusors at the back would likely make a big improvement but at significant cost.
As for the monitors, I’ve had a few people ask this, and it’s beginning to cause me to doubt the positioning. I used to keep them upright and found the sweet spot to be too narrow both left-right and up-down. Turning them on their side widened the image while remaining clear in the center and it allows me to lean back without losing the highs. I may try them vertical again.
The monitors are Yamaha HS-50m they are rear ported, there are no external heat sinks on these monitors. I just googled a bit and did not find any official statement from Yamaha about it, just a few other users that prefer them horizontal.
I think it’s a myth that needs to be busted.
This is Great, Thanks .. came out looking nice
I have almost the same looking room, but i have standing wave on 100hz and its harmonics.. and corners did not figured it out. Amy suggestion? I tried several speaker positions but nothing happened..
Increase the depth of your corner bass traps.
It is impossible to increase the depth. If you have room like 2,9meters X 4,4meters and you have on the shorter wall window 1,8×1,45 meters and on the oposite wall you have door near to one corner.
I tried put the absorber panels right behind each speaker and it helped with 100hz, but it made really big peak on 163,333 hz. I also tried several different positions of the speakers and change the normal position into laying position. I think tuned membrane absorbers can help for such a small room. I already have each corner filled with corner bass trap, there is no space to have bigger.just one corner next the door is currently without basstrap, because of the space. I also fixed first reflection points on the paralel walls and ceiling. There are the biggest problems on 100hz if speakers are standing normally and other harmonic modes of this freq. up to 498hz. When they are laying the frequency is different – 163,333hz.
I have very similiar set up of the accoustic materials you used in tihs tutorial, but the room modes are there and they are making big troubles. Thanks for any help / suggestions.
Are the corner traps completely filled with insulation and do they go floor to ceiling?
You said an absorber “right behind the speaker”, mine are about 18 inches away. Are your monitors front or rear ported?
For very specific problems you can look into Helmholtz resonators which are tuned to a specific frequency.
I’m in a different room now and I’m about a year late in writing about what I’ve done for acoustics.
Yes, they are filled from the bottom to the top of the wall and I jse certified GIK acoustic TriTraps. But there are just 2walls, where I can afford to have the full corner of nass traps, the other one starts about 60cm from the floor, because there is an heating radiator and the fourth corner (oposite wall) is empty because of the door – I have to put there something thinner. Yes there is possibility of resonator then or membrane absorber which works for more frequencies, than just one resonator.
Btw. here is the picture https://www.dropbox.com/s/jg99uxggyhhl5wi/2014-09-15%2021.21.07.jpg?dl=0
Sure I tried several positions of the speakers – no difference, so I put absorbers right behind each speaker to test it – the result around 100hz was a little better, but there is still big dip and there was new big deep null in 163,33hz. So I am thinking.. if I will use resonators, where should I place them? Because standing wave (axial) goes right through the room from front to rear wall, should I focus on the rear wall (behind the listening position, the one which is on on the pic) and put there the resonators / tuned bass traps and leave normal basstraps in the front wall corners? How about the higher harmonic freq until 500hz? If I eliminate the room mode around my critical 100hz, it should affect also its harmonics yes?
I’ve never used a tuned absorber, most likely you would have it along the back wall. Have you spoken to GIK about your issues?
Do your monitors have any low freq room compensation switches?
Fixing the 100Hz issue will fix 200, 400Hz, octaves.
Are the calculated room modes corresponding with what you’re measuring? http://bobgolds.com/Mode/RoomModes.htm