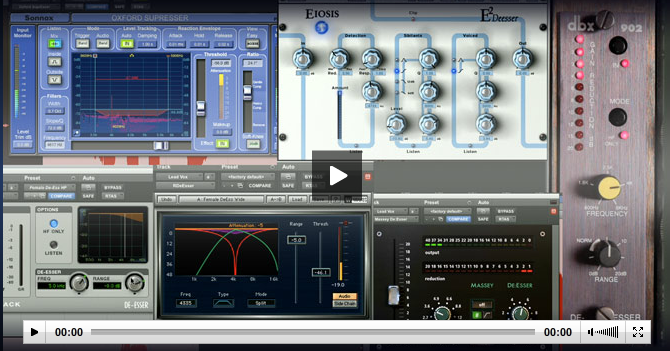
This post was sent in by Joe Clar at JoeClarMusic.com. I’ve expanded on it to include a few additional resources. These additions are identified in italics. The original post can be found here.
De-Essing Approaches
I was recently working on a song and the sibilance was just a little too much for me. Like anything in audio there several ways of accomplishing the same task and different people will have different opinions but these are a few ways that I found to be effective.
1. Automate Each and Every Sibilance (The Manual Approach)
There’s a thread with this in Gearslutz (link) that offers a very good solution. It is basically to put a trim plug in and then automate the volume of the trim plug-in on each sibilance. This way is also completely free and similar to compressing by riding a volume fader.
Advantages– No artifacts, Cost-effective, You can choose how much you want to decrease each sibilance, Doesn’t interfere with volume automation for the track and you can bypass the plug-in or go back and tweak if needed.
Disadvantages- Can be time consuming if there are lots of background vocal tracks or doublings, Can’t be saved as a setting that can be applied to future or similar vocal tracks.
Photo from Gregory Scott’s Gearslutz post
“I put this on a trim plug so it’s separate from volume automation, makes it much easier to edit as the mix progresses.
If you slide your first two nodes to the right, you can let as much or as little transient thru as you’d like. If you add nodes, you can put the transient at one level and the ess at another.
Each sibilant (ess or tzz or chhh or fff) is tuned by ear, so the amount of control is unparalleled. Once you get up to speed, you can do a whole track in about 5 minutes. Sibilants are very easy to spot visually, they’re much denser and faster than anything else on the track.”
–Gregory Scott – ubk
A variation of this tip is to use clip gain/item volume or other pre-FX gain adjustment in your DAW to turn down the volume of the offending areas.
I recently set up an action in REAPER to speed up this process [split selected area, turn item gain down 2dB] I have the action assigned to a convenient keyboard shortcut. I have another to boost and another to mute. I’m using these a ton for de-essing, breath reduction, leveling vocal and dialog dynamics, and similar tasks on instrument tracks.
Recently I was mixing a song called Mother Earth, every time the word “Earth” was sung the TH sound was held too long. No one makes a De-Ether so I knew had to figure out a manual method. I found the best way to was to reduce the TH section of the waveform by 2dB and time compress it by about 60%.
2. Use a De-Esser Plug-in (The Automatic Approach)
When a De-Esser plug-in is set correctly it can be fast and easy. However it usually takes a little time to find the problem frequency, then to set the threshold so it doesn’t get triggered by other material, and then to have it work for many different sections of the track. There’s quite a bit to take into account and you will most likely need to automate some of the parameters of the De-Esser to get it right. There are some videos on Pensado’s Place that go over this in the Into The Lair Section. Pensado’s Place is definitely a show worth checking out, he is very knowledgeable, a Grammy Award winning mixer and a genuinely nice guy sharing what he has learned working in music.
Fab Dupont has a great video demonstrating the how-to and differences between 6 popular de-essers.
One method I found works for me when using a De-Esser plug-in is to set the frequency band to be fairly wide and to use a shelf shape instead of just notching out a narrow frequency band. Usually the offending frequencies fall between about 4k to 12k but I’ve gotten good results using a hi-shelf shape at 6k and about 6db of gain reduction. When I was using a narrow band it wasn’t really taking out all of the harshness that I wanted. I also have read using multiple narrow bands but I would most likely use the manual method before resorting to this.
Advantages: Once set correctly it can save you from having to automate each sibilance, It can take out just the upper frequencies and leave the un-offending frequencies in tact, Can be saved as a preset so if you recorded many tracks with the same singer, the same microphone in the same studio then it should be pretty close for each vocal track, The attack and release times can be set on some De-Essers.
Disadvatages: Can sometimes need automation to get right, If the De-Esser is triggered too much it can give the singer a lysp.
Note: De-Essing can also be thought of as frequency dependent side-chain compression. A multiband compressor has many similarities of a standard De-Esser plug-in and is a good way to visualize what a De-Esser is doing.
Conclusion:
There isn’t really one way that will work for every singer in every song so experimentation is required to find out what’s best for that particular situation.


RT @theaudiogeek: New on AGZ: Guest Post: De-Essing Approaches http://t.co/IY1qTPLH
RT @theaudiogeek: New on AGZ: Guest Post: De-Essing Approaches http://t.co/IY1qTPLH