This is a guest post from Samuel Allen of Extreme Studios in Perth, Australia. This article has been edited, the original can be found here.
This is a quick how-to for the technical aspects of preparing a master CD in Wavelab. This article does not explain audio processing techniques for mastering such as How to make a song louder in mastering, How to use Ozone for mastering, or How to use Multiband Compression.
I personally master in Wavelab, which is pretty straightforward for Cubase users, as it supports VST plugins. Although, it can be a bit counterintuitive when coming from Cubase if you expect it to work in the same fashion. If anyone is interested I can go into a more in depth tutorial about fade ins/outs on tracks, crossfading, etc, but for this one I’m just going to show how quick and easy it is to create a duplication ready DDP or physical master with ISRC code, EAN/UPC code and CD text embedded and ready to go.
New Audio Montage
Step 1 is creating a new Audio Montage, do this from the floating panel by clicking the button as per the image below, after which you want to select Stereo, CD compatible, 44.1khz from the dialogue box which pops up afterward
Import Audio Files
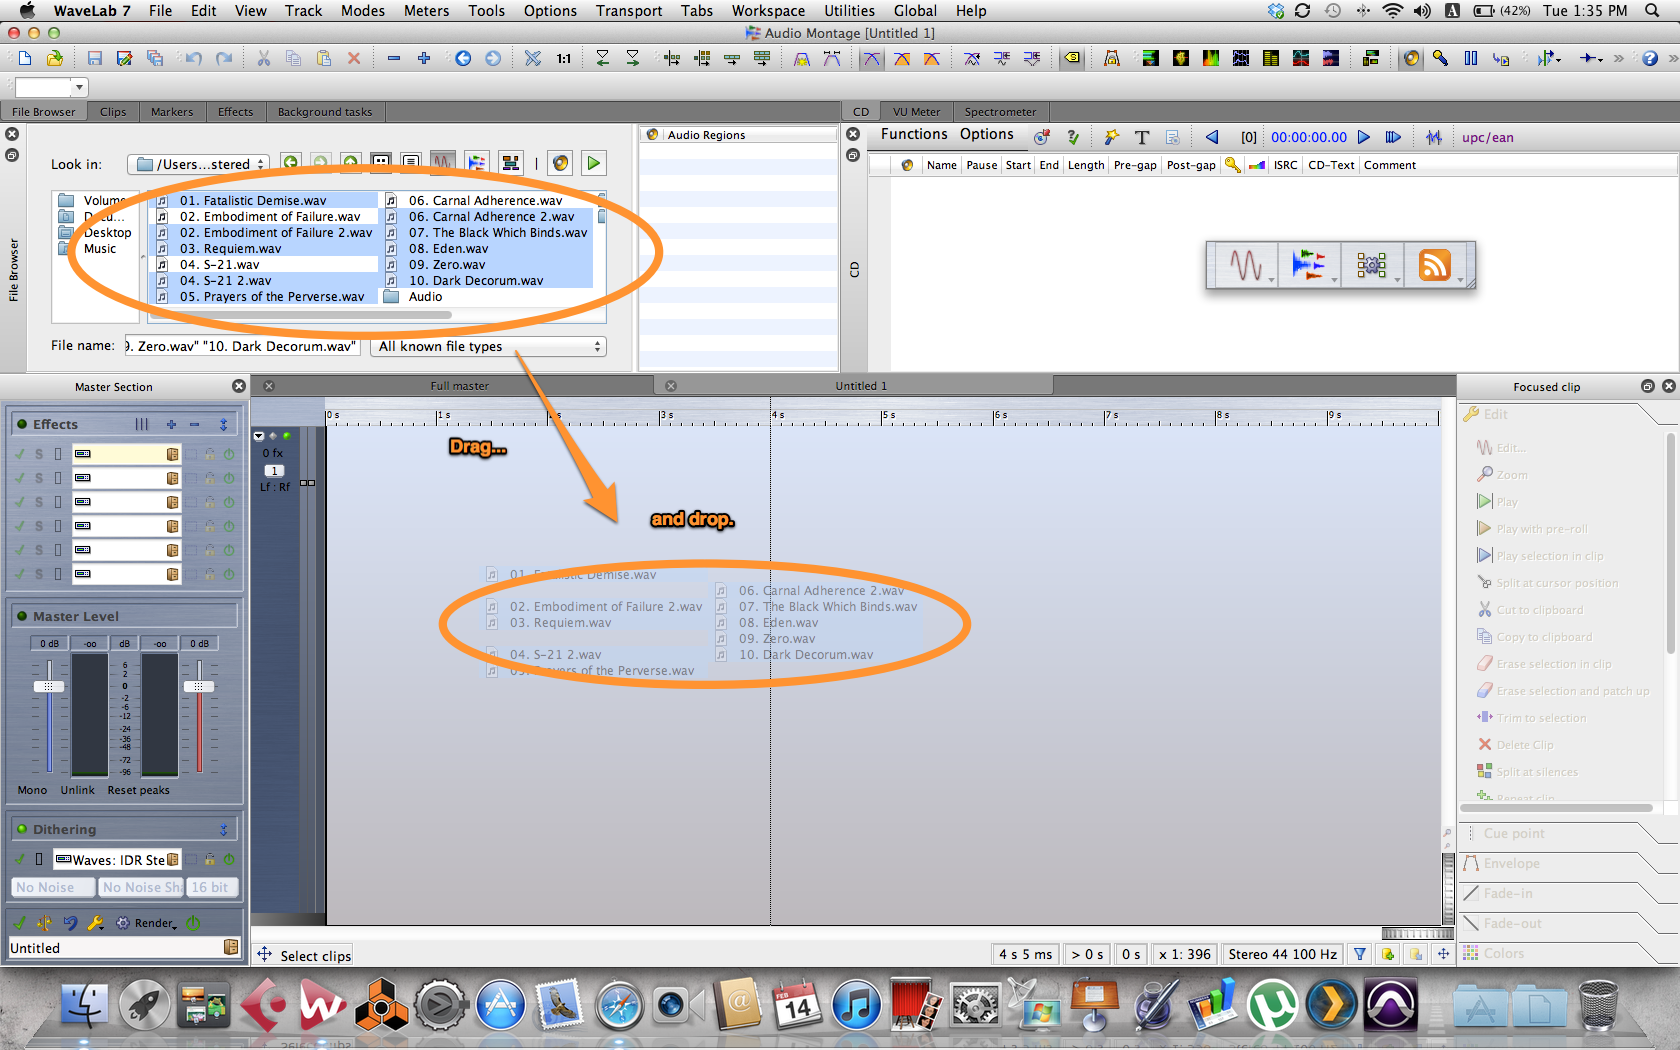
Next we want to head to the file browser in the top left corner and drag our tracks to the Montage, I prefer to render my files with the track number at the start so they all come into Wavelab in order. I also line them up on the one track as per the second image below, in order to more easily align gaps/fades/etc.
CD Wizard
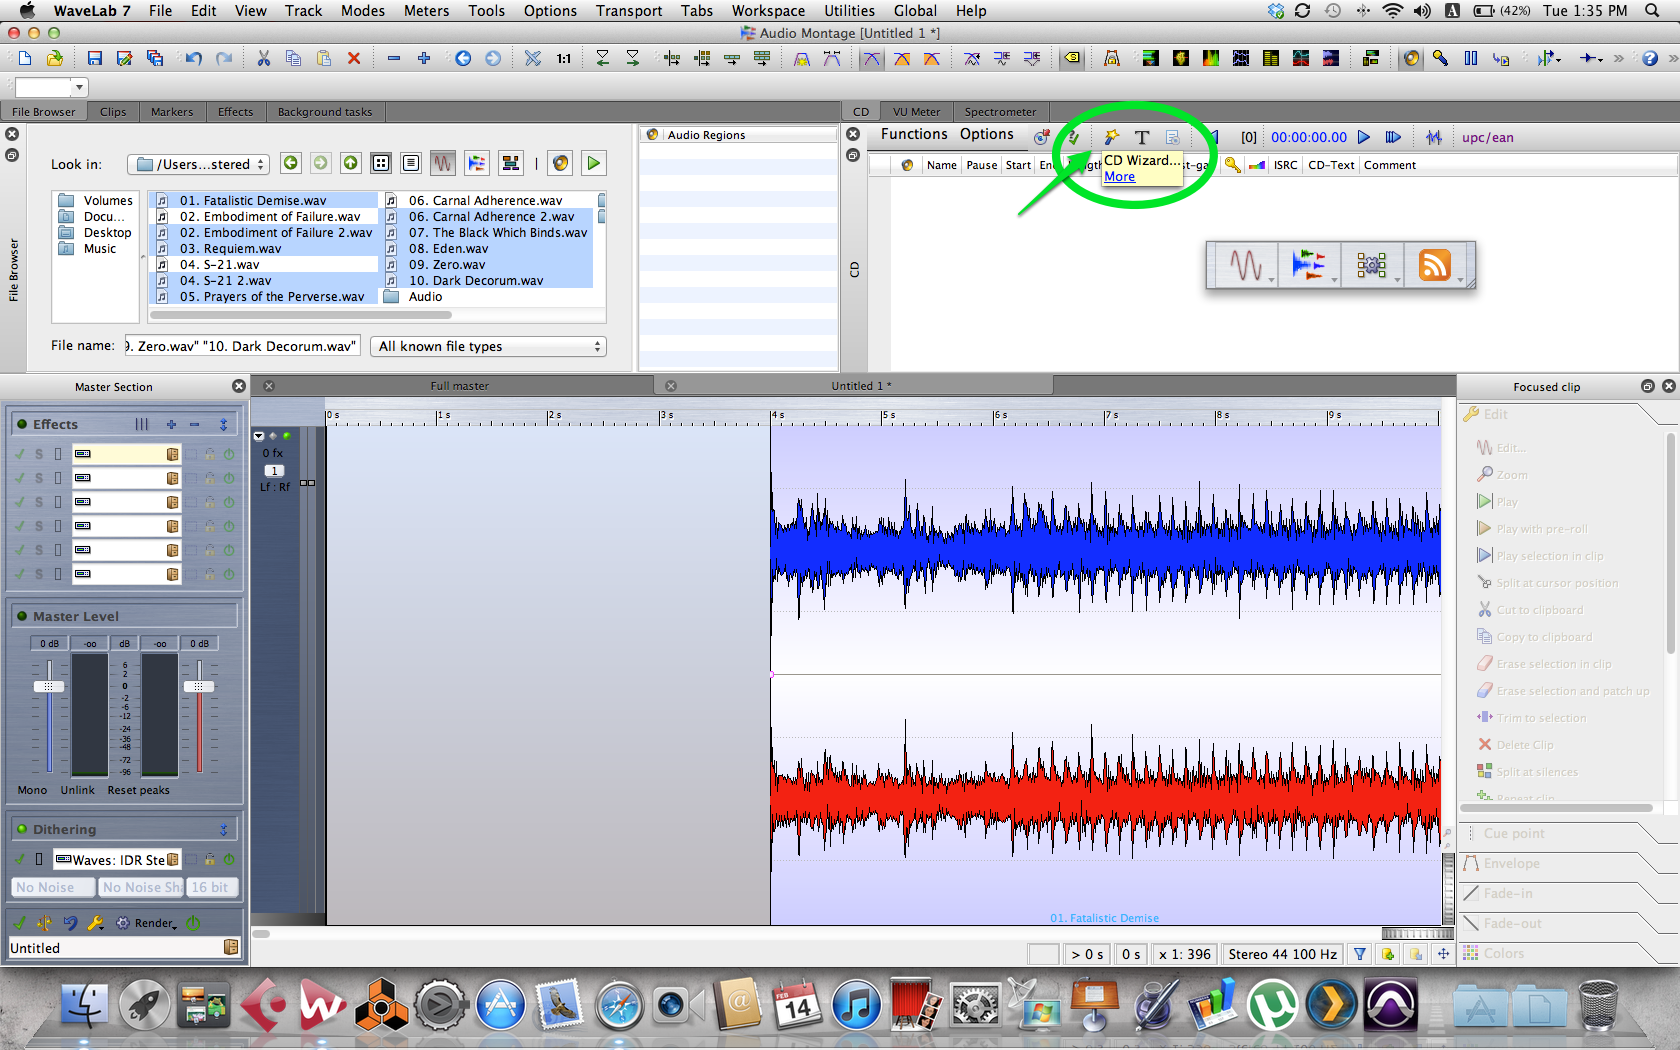
Next we want to click the CD wizard, located as per the following image, where you see the CD wizard floating text dialogue.
The next image shows what you will see after clicking here, I recommend sticking with the default options regarding marker creation, as this will place start and end markers at the start and end of each clip, and lock them to the clips, so if you move the files around to change the gap lengths, etc, the markers will stick to the clip boundaries.
You can select the pause length between tracks, of course set this to 0 if you want a gapless CD, the next section allows you to set silence before/after markers, etc. Again set these to 0 for a gapless disc. You can leave all these options at default and manually move the waves to butt up against each other in the montage window afterwards if you prefer or if anything you specify here messes this up at all.
Insert ISRC and Barcodes
You can also insert the ISRC codes automatically and the EAN/UPC. Obviously the band/label should be providing these to you, if they request you to get these for them, check with USISRC or your local agency for info on how to do these, but probably best for the band/label to take care of all that.
CD-Text
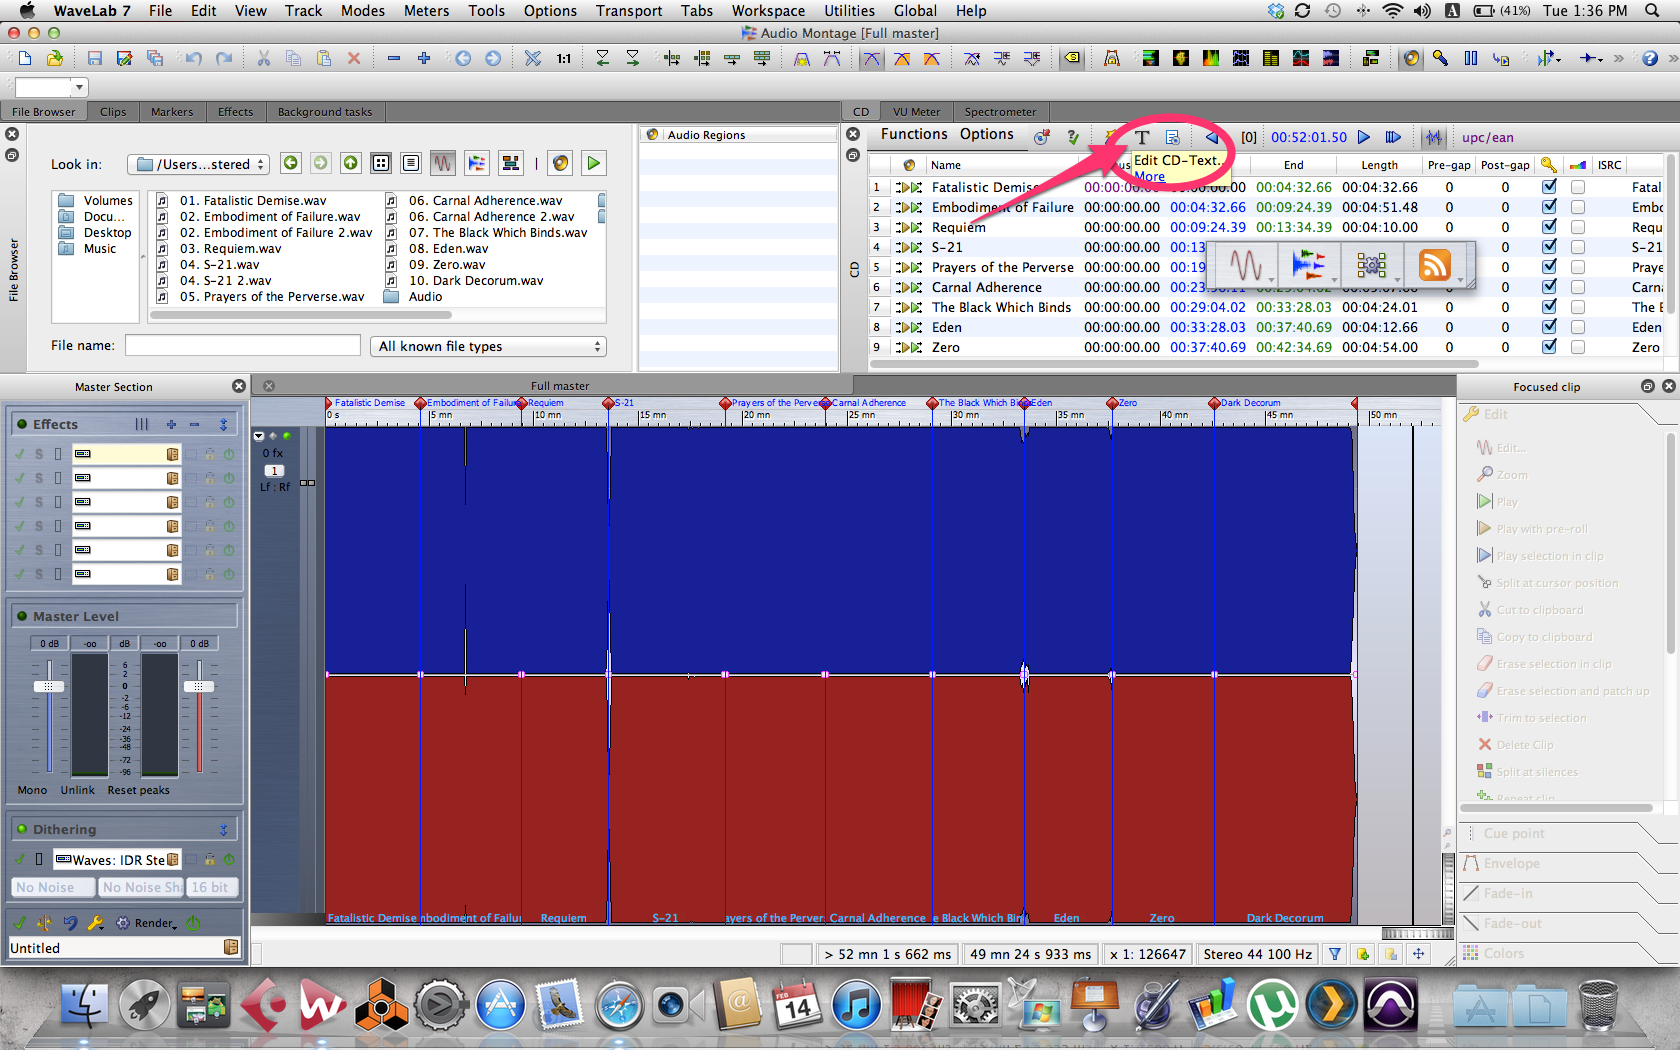
For CD-Text, hit the large T for text icon in the CD window as per the following image, again where the floating text is located on screen. The next image shows the dialogue you will see at this point, and you may want to take note of the buttons on the right side of the screen that will propagate the info in each field across all tracks in the Montage, saving you from re-typing artist name, etc. into each one.
CD-Text is not read by very many devices other than car players, but it is still important. The easiest way to check if the data did burn properly is to pop the CD in your drive, open Wavelab again, go to utilities > import audio cd. On that window, hit functions > examine CD-text. This will show you whether the info was burnt or not. CD-Text will not be read by iTunes or other media players. Here’s a helpful article if you want your albums to appear correctly in iTunes, WMP and such when inserting the disc into a computer: Getting your CD track info to show up on computers
Time to burn
After you’ve done all this and the gaps are as you want them in your montage, time to hit the Write audio CD… button, again where the floating text is in this image.
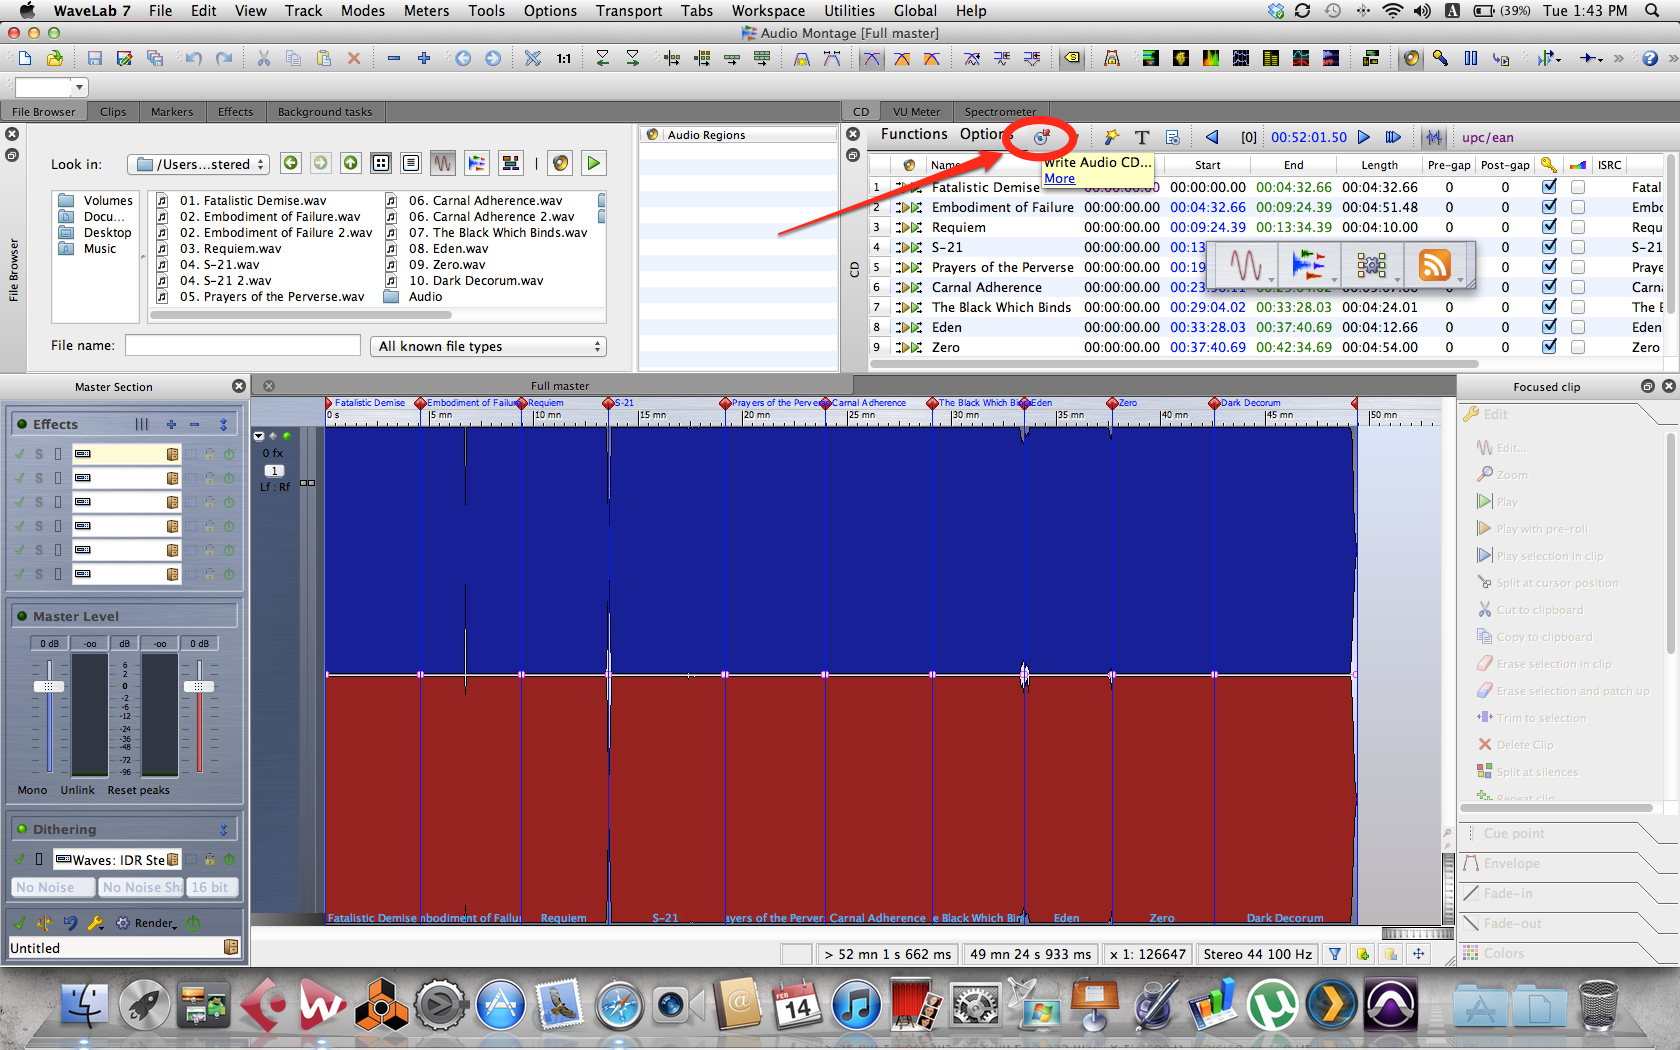 You will then be able to burn the Montage straight to a disc if a physical master is required, or you can choose to output to DDP format for digital delivery. DDP output generates cue files, etc. as well. There is also a handy generate CD report function in the CD window that will give you a nice HTML document with all the track numbers, names, start/end points, barcode, ISRC code info, etc. I like to print and include this with a physical master, or include it in the archive with a DDP.
Final thoughts
Powerful and easy software, I couldn’t live without it personally. There are numerous further options inside the software for error checking for any clicks/pops, etc, and you should familiarize yourself with all of these before you actually submit the product, but this is a pretty good example of how quick creating the final product can be with this software.
Note – if your files are not already 16bit/44.1khz, you should ensure you put something in the dither slot in the master section. Wavelab has the Apogee UV22HR included, my personal preference is Ozone using the MBIT+ (megabitmax) on Ultra shaping. I would also generally recommend that you don’t dither on export from your DAW unless you have done all your fades in it as well, if you’re going to use Wavelab to create the fades, do your dithering there.
This is a guest post from Samuel Allen of Extreme Studios in Perth, Australia. This article has been edited, the original can be found here.




RT @theaudiogeek: New on AGZ: How to Create a Duplication-Ready Master in Wavelab http://t.co/chXRSqIt
@theaudiogeek People still listen to CDs?
How to Create a Duplication-Ready Master in Wavelab http://t.co/92TL7pjy
RT @prodAdvice: How to Create a Duplication-Ready Master in Wavelab http://t.co/92TL7pjy
RT @prodAdvice: How to Create a Duplication-Ready Master in Wavelab http://t.co/92TL7pjy
RT @theaudiogeek: New on AGZ: How to Create a Duplication-Ready Master in Wavelab http://t.co/chXRSqIt
How to Create a Duplication-Ready Master in Wavelab http://t.co/4ISuCLCS
How to create a duplication-ready master in #Wavelab (#music) http://t.co/KVwRXmRv
Good article! I I input UPC code and operate my work successfully according to your tutorial. Thank you! Your sharing is quite useful.